How Can We Help?
Amazon SES
Installation instructions for Amazon SES
- Upload all Email Plus+ files as per the included instructions.
- Go to “Setup, Addon Modules, Email Plus+” and Activate then add your license key for email plus.
- Log in to your AWS account @ https://aws.amazon.com. Select the region you want to send from in the upper right corner.
- Go to “Services, IAM”. Select “Groups”. Create a new group, and select the Policy “AmazonSESFullAccess” for this group.
- Select “Users”, the Add a new user with “Programmatic access”. Add to the user group created in step 4.
- Create the new user, and copy the “Access Key ID” and “Secret Access Key”. Paste these into the Email Plus+ addon configuration page.
- Next, in AWS select “Services, Simple Email Service”.
- Click on “Domains, Verify New Domain”. Add the CNAME and TXT records to your DNS server as instructed for your email domain you will be sending from in WHMCS.
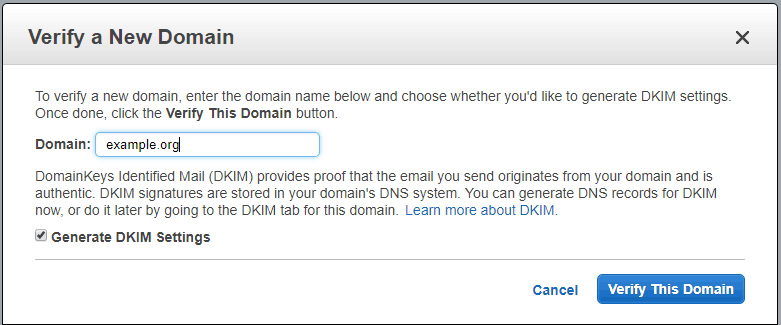
- Verify the domain for sending. (You won’t be able to send any emails until this has been completed.)

- Click on “Configuration Sets, Create Configuration Set”. Name your new set. Copy this configuration set name, and paste into Email Plus+ addon configuration the Save.
- Edit you new configuration set.
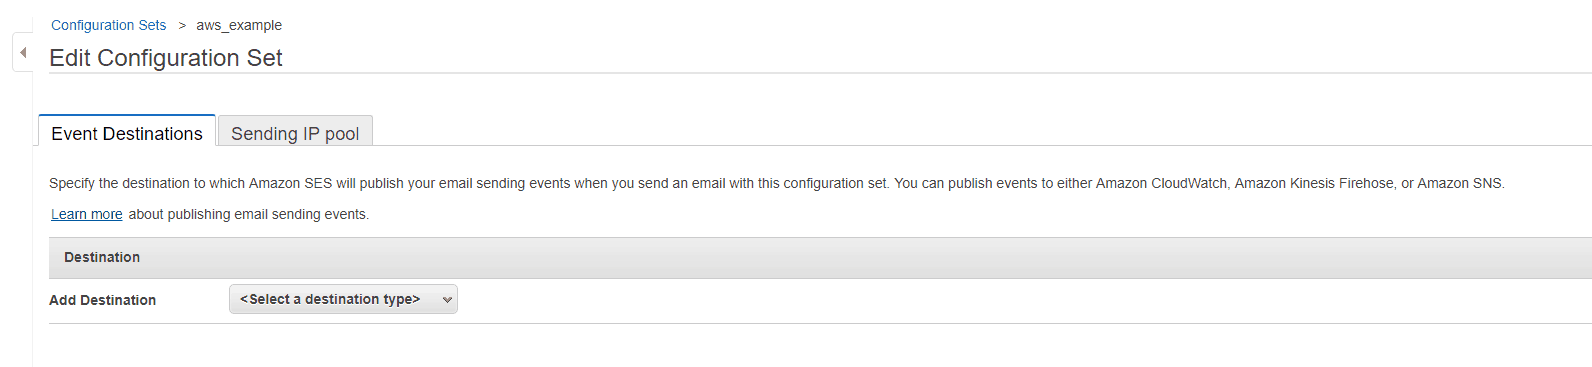
- Under “Add Destination”, Select “SNS”. Create a new SNS Destination, with the event types you would like to receive in WHMCS.
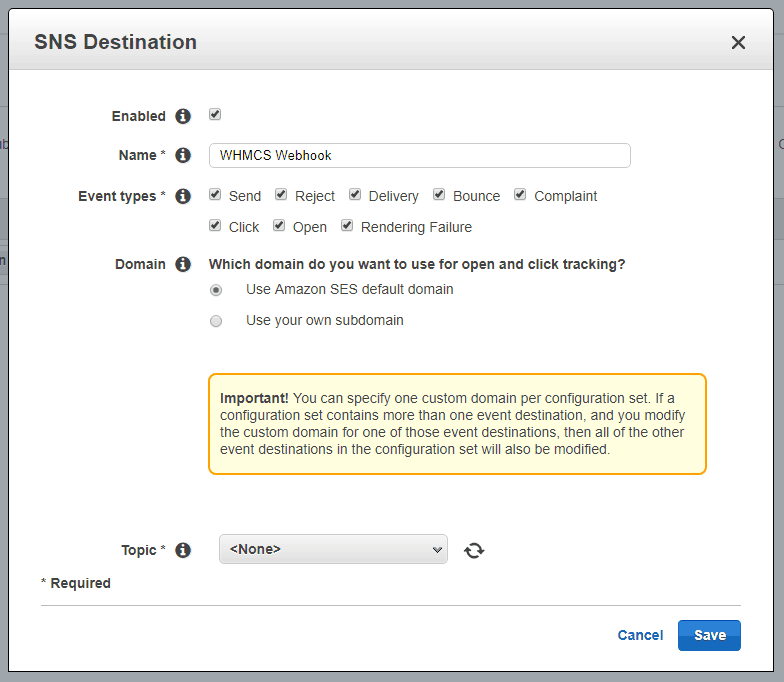

- Under the “Topic” field, change None to “Create SNS Topic”. Click “Save”.
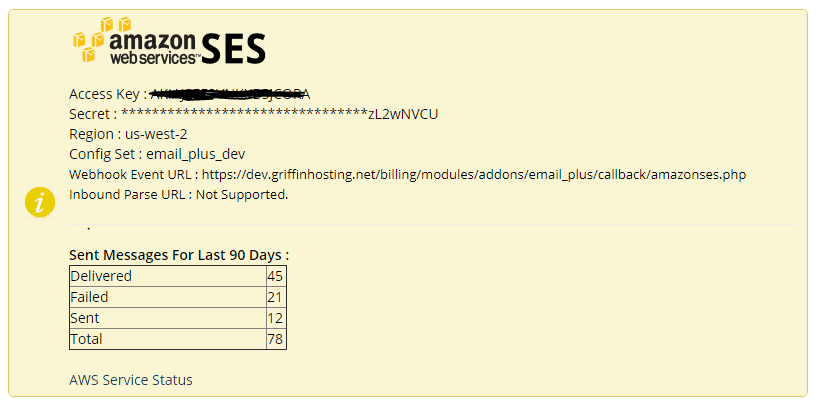
- Go to your WHMCS installation, and select “Addons, Email Plus+”. Scroll down to the Amazon SES information box. Copy the Event Webhook URL.
- Now, go back to “Services, Simple Notification Service” in the AWS console. Select “Topics”. Check the box for you topic created in step 12, and under actions select “Subscribe to topic”.
- Paste the URL into the “Endpoint” box. Click “Create Subscription”.

- Click on “Refresh” icon, on the subsrciption page to verify the new subscription has changed from “PendingConfirmation”, to a valid ARN.

- Configuration is now complete. Navigate to “Addons, Email Plus+” in WHMCS and click on the “Diagnostics” tab. Send a test email to yourself through Amazonses.
- Please contact Amazon for advanced configuration help. We are not AWS support….